Welcome to AltairKit.com! Home of the New Altair 8800 Kit! |
| Creation
of a Kit... Visit Stockly Electronics Forums to respond to this story! |
It all started about two years ago... I wanted to produce a "kit" that people could assemble. Something that you could spend a whole week after work assembling and after some debugging see your sweat and tears come to life. Why did I want to produce a kit like this? Because -I- wanted to build a kit like this myself! On and off I played with creating a kit of the Apple I computer. I spent some time with raw scans of the PCB trying to trace the artwork, but progress was very slow. Around December 23rd 2005, I was window shopping on e-bay when I came across an Apple I kit! My heart was crushed! Almost instantly, however, I forgot all about that and wanted to buy one. ;)  So an Apple I kit is out of the question, it's been done! My next favorite computer is the Altair, and it is actually obtainable! I found an Altair for sale with quite a few extra memory and I/O boards. It was in fairly good condition and had a few manuals, so I was happy. The D0 switch didn't work so I couldn't actually toggle in any programs, and in fact I never fixed that switch before completely disassembling the entire computer! The best part about the Altair that I had just bought was that it had been used by ARP Instruments as part of an experimental computerized music synthesis project. Included with it was a bunch of documentation on synth control, some disks containing the code, and some custom interface cards. I love time capsules, but the ARP story is for another day...  The ARP Instruments Altair - its alive...sort of... I began the project not wanting to "destroy" my Altair. I had after all paid a lot of money for it! Todd Fischer replied to me in an e-mail "One flag comes up that suggests that you're not as committed to this idea as you seem. When you write "I'm not interested in the project enough to buy a perfectly working Altair just to desolder all of the parts!", it tells me that you are limited in your intent.". I stuck to the idea of not desoldering the Altair for a good 5 months! In the mean time I had sent away some pictures of the CPU board to several companies that offered "Raw PCB to Gerber" conversion. That is where a raw PCB is placed on a calibrated high resolution scanner. With the aide of a human, the computer recreates the copper, drill, silkscreen, and solder mask (if present) Gerber cad files. I received responses that ranged from $200 to $1300. Since that was JUST for the CPU card and I had quite a few that needed to be reproduced, I decided to try "scanning" myself. I attempted to do this quite a few times using different software packages. Just to show you how hard I tried to avoid disassembling my original Altair boards... Since I work for a company that produces digital x-ray equipment, it was easy to get x-rays of the MITS boards. I actually scanned the bottom of the board, made that layer of the board translucent, and then overlayed the x-ray. This looked pretty good, but it is a LOT of work to "scan" a board by "tracing" the traces! It was pretty neat being able to see the traces that were underneath the ICs...even the traces under the dies! Quality is important to me, and I wanted boards that were as close to the original MITS boards as possible. I finally decided to turn to the PCB scanning outfits...  The scanned/x-ray composite Altair CPU board. This is a scaled version. The file I was using was 300dpi. In the end, I decided to use Mile High Testing Services to scan my boards. They were second to the cheapest and their web page made me feel confident. (If you contact them, tell Steven that Grant says "Hi"!) This involved me desoldering every single part off of the boards and then cleaning off all the solder/flux. See a pattern here? Someone gives me good advice and I try to take a different direction. ;) Advice from Steve Gabaly, creator of the Apple 1 kit, went like this "...if I were going to make an Altair I'd have the boards reproduced by a PCB scanning service and get a perfect set of boards in a few weeks with no hassle..." It wasn't QUITE "no hassle" because of the very poor quality silkscreen on the original MITS boards. After spending an average of 10 hours on each PCB cleaning up and restoring the silkscreen, my cad screen looked something like this: 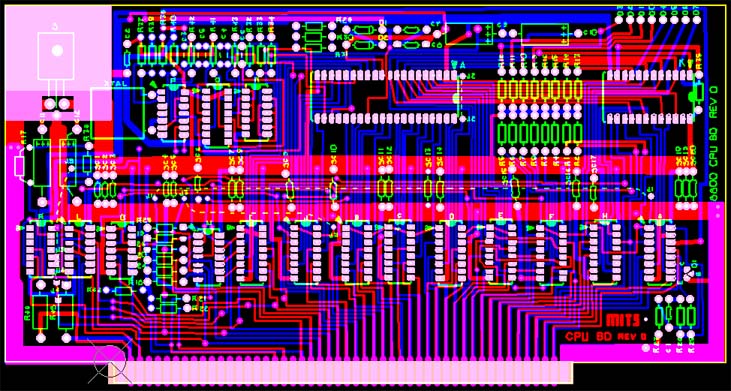 The Altair CPU board Gerber file including my solder mask layer, the fonts don't seem to render very well on screen... I went through each PCB with a fine tooth comb. I repositioned all of the silkscreen elements to where I thought the original intent would have been. I also created a solder mask for the PCBs to improve appearance and to make it easier to assemble. Here are some sample before and after pictures of the 1k memory card. These don't show the worst cases, but are still good comparisons. 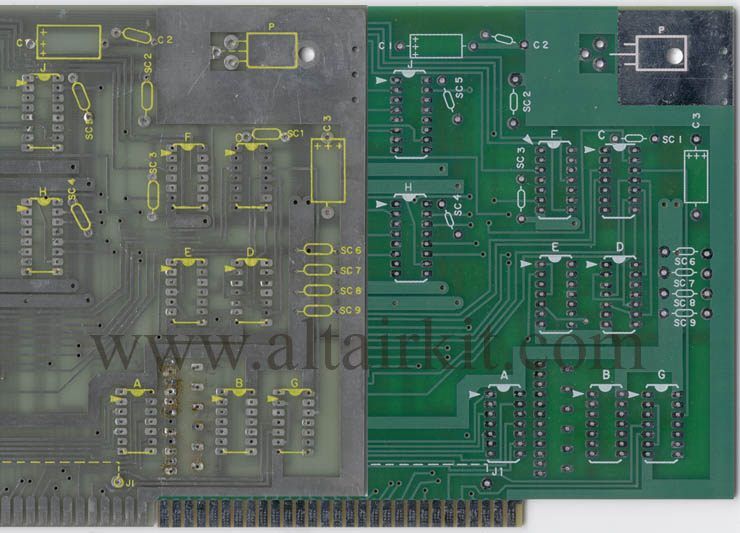 MITS board on the left and reproduction board on the right The MITS silkscreen was used where ever possible. Sometimes I had to copy and paste letters/numbers from other parts of the board. Quite a few times the first letter was on top of a pad, etc. I also shrunk the symbols so they would fit between the pads. The arrows now point to pin one instead of being on top of pin 2, etc... Before I found Imagineering Inc (they have inexpensive boards!) I avoided getting PCBs with a solder mask/silkscreen manufactured until the design was proven. There is the chance that the scan could have an error. So a prototype Altair was made using copper only boards. Here are a few pictures of the prototype: 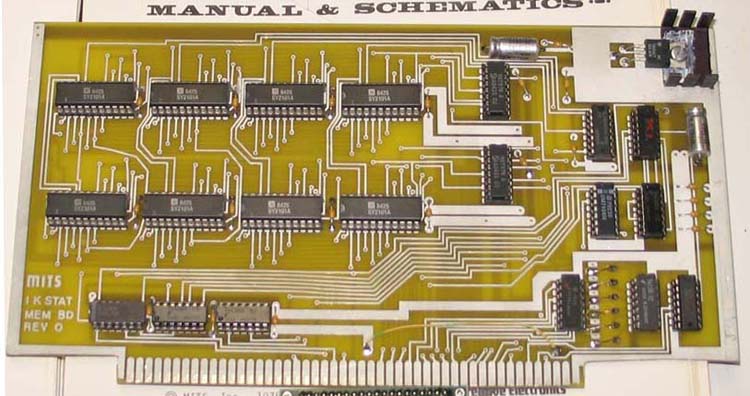 The prototype 1k card only had one problem. One of the capacitor pads was placed too close to an I/O line. Some unremoved flux made it look like the gap was supposed to be bridged when the board was scanned. 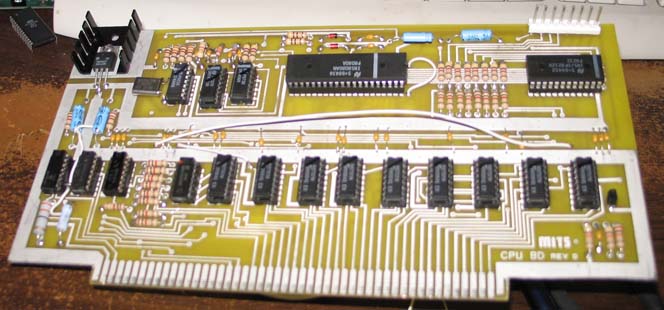 The prototype CPU card had no problems. The only "problems" that it had was me. Since it didn't have a silkscreen I accidentally placed a jumper wire in the wrong hole! After 5 hours of debugging I found the problem. :) 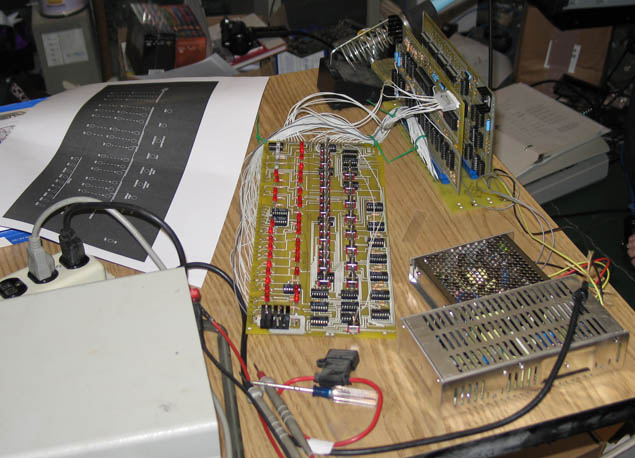 This is the first time that the prototype was powered up. There was one problem on this board. This time a bridge between a pad and trace was missed. A VERY small piece of copper was missing. Quick and easy fix in the CAD program. Other than that, it runs great! The clean power from the switching power supplies makes "Fool on the Hill" sound like electric bag pipes! :) Also seen in this picture is my dress panel reproduction artwork printed on paper 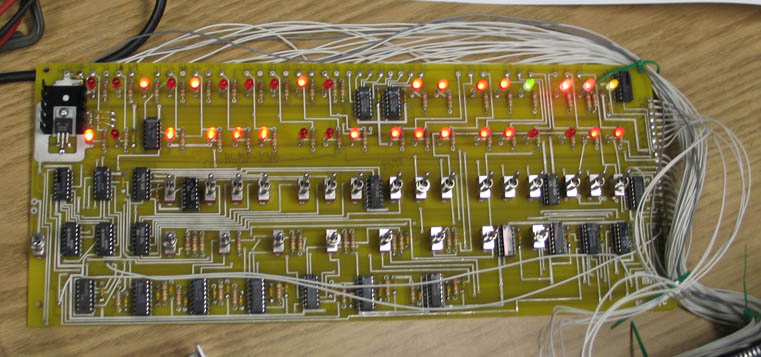 Just for fun I threw some random LEDs on this prototype. 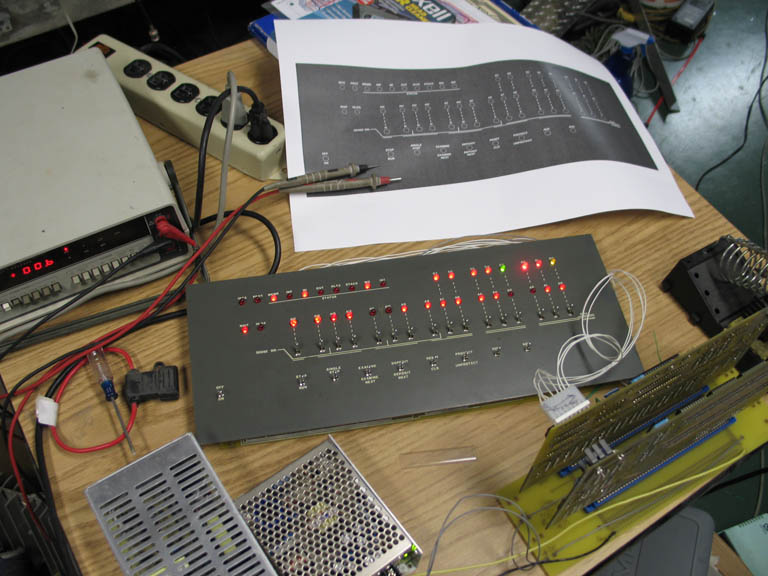 Here is the prototype with a real Altair dress panel over the PCB. This makes it easier to use. Working with "naked" Altairs has given me the ability to toggle switches without looking for the letters. ;) My first order with Imagineering Inc was for the 1k SRAM board. I had never generated my own solder mask layer by hand so I was really worried something would turn out bad! Luck was on my side, and the prototype production 1k RAM board looked GREAT! :) 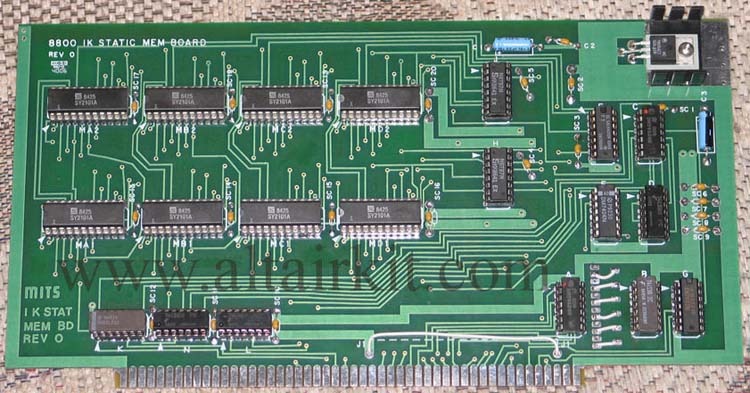 The first production card produced. Another important part of the Altair is the enclosure! The Altair wouldn't be an Altair without the Optima case! As many of you know, the Optima case was discontinued around 20 years ago! This is a problem! I contacted Optima and paid them to reproduce the case for me as a custom part. So it is in every way an authentic Optima enclosure. Employees who manufactured these cases still work for Optima and remembered a lot of the details about the case and its construction. The case is made by hand with the assistance of CNC (computer numeric control) machinery. The paint/color codes used on the cases is identical to the cases sold in 1975. The front panels are powder coated and then silkscreened with white ink. The silkscreening method used on these cases is more durable than the method used in 1975. 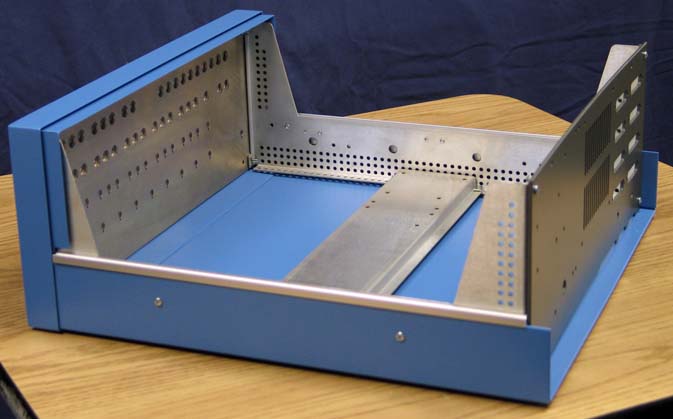 The Altair 8800 Optima case. Every detail about the original Optima case was carefully copied, down to the countless holes on the side supports! The front bezel and side trim were made from Aluminum extrusion. The case is a perfect reproduction. Well, here we are. The kit is available to anyone who wants it. I hope that it gives you as much fun as it gave me! Make sure to visit the "More Pictures" link as well as the "Stockly Electronics Forums"! Those locations will have a TON more information eventually!  The Altair 8800 Kit! |
| ©2007 Grant Stockly
|